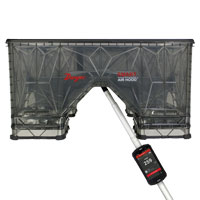
Purchasing measurement and test equipment, such as the Series SAH SMART Air Hood® balancing instrument, in bulk or batches allows you to have a back up when the equipment you regularly use needs to be serviced, thus preventing down time. In some cases, purchasing large quantities of the exact same make and model may give users the idea that the performance of each unit can be checked by comparing one to another. Although direct comparison of similar units may be good to identify operational defects, direct comparison of units with the exact same make and model from the exact same batch / date code does not allow for detection of potential systematic errors in your product’s performance.
To better ensure control of measurement process errors (also known as measurement uncertainties) of a measurement setup / system, methods used in Process Measurement Assurance Programs (PMAPs) are very useful to adopt when it comes to managing your measurement & test equipment along with the work done with it. Rather than performing accuracy checks with devices of the exact same make and model from the exact same batch / date code, you ideally want to have a control (or check) standard that is not only representative of the equipment you have implemented, but a control standard that is well characterized and identified as a control standard. This control standard is a device that you ideally keep in your inventory of equipment for some time and have calibrated routinely to develop a history on the device with regard to its performance characteristics.
 Users can benefit from implementation of control standards as they allow you to continuously monitor the status of your measurement & test equipment without having to perform a calibration every other day (NOTE: In a laboratory environment, the laboratory measures the control standard at routine intervals and records the data for analysis of the control standard performance over time). While sending your equipment back for calibration at routine intervals is essential and highly recommended for a successful PMAP for your equipment, the usage of a control standard will help you identify potential issues such as gross real time measurement errors (that may be inherent to the system being measured, as well as variability in the measurement process itself or instrumentation being used), operator bias, or environmental variations. Introduction of a control standard into your measurement and testing strategy can increase confidence in the data produced by the equipment you use regularly, as long as the data captured when using a control standard is used objectively.
 It is important to remember that although you can use a Series SAH as a control standard for an operational (or functional) comparison, your control standard and your other measurement & test equipment need to be calibrated at routine intervals (i.e., the control standard should not be the only device receiving calibrations regularly). That being said, by continuously monitoring the measurements performed by using your SAH control standard, your SAH control standard should be used only for checking your equipment, not for on-the-spot calibration or general production work. We recommend calibrating your SAH (both control standard and general) every 12 months in agreement with NEBB instrument requirements.
When your SAH is ready for calibration, please visit our calibration website for professional, quality calibrations with a two-day turnaround time.
